Aeroponic Systems Explained and How to Build
What are Aeroponic Systems?
These systems can be a bit trickier to put together. They are quite high tech and therefore tend to be more expensive. In aeroponic systems, the roots of plants are enclosed in a space known as an aeroponic chamber. Plants usually stick out of holes that have flexible rubber collars—these are simple to use. Plants are suspended in the air, and below the plants there are mist nozzles that spray the nutrient solution on the plants’ roots. It can look quite futuristic. These systems can often look like cubes or towers with the mist released at the top, and as the droplets cascade down, the roots of the plants get moisture and nutrients, but at the same time they can breathe well because they are surrounded by air.
This vertical structure means they take up less space, so you can have quite a number of towers in your house. You can also easily move an aeroponic tower to a different location. Aeroponics is an extremely clean and sterile way of growing. Usually, no growing medium is used in aeroponic systems, so roots can spread out as much as they want, and that can be cost saving too. In aeroponic systems, plants grow really fast because they get so much oxygen, so it can be quite satisfying to see the rewards of caring for them and getting a good yield fast.
The reservoir that holds the nutrient solution also contains an oxygenating air pump. The mist nozzles are connected to a water pump, and pressure causes the solution to be sprayed. If the plants have excess nutrients after being sprayed, these fall back into the reservoir below them. You can grow most types of plants this way, but you’ll need a deeper reservoir for larger plants. Aeroponic systems use less water than other types of hydroponic systems. They can cost more to build, however. They also need a bit more maintenance than other systems. Sometimes you will find that the nozzles that spray the nutrient solution become clogged and will need cleaning.
Some growers who use this type of hydroponic system use a non-stop fine mist, while others will mist on a cycle. If it is on a cycle, there are only a few minutes between each cycle. They are much shorter than in ebb and flow systems, for example.
The types of plants that do well in aeroponic systems include lettuce, leafy greens, tomatoes, peppers, eggplants/aubergine, ginger, strawberries, watermelons, edible flowers, and herbs. Root vegetables, such as carrots and beets, don’t do well in these systems, and fruit trees are too large and heavy for aeroponic systems. Plants can outgrow aeroponic systems and will need to be transplanted elsewhere, so you may need to have alternative places if this occurs.
Aeroponic systems tend to be more expensive to set up than other hydroponic systems because you’ll need reservoirs, timers, pumps, misting nozzles, and more. You can make DIY aeroponic systems, which will be discussed later in this article. If you have an aeroponic system, you need to ensure that you frequently check timers and pumps so that your plants are misted properly otherwise the roots will dry out and your plants will die. If you lose electricity, you’ll need to manually mist the plants with the nutrient solution to keep them moist. And finally the root chambers will need cleaning to prevent diseases.
There are two pressure systems used in aeroponics: low-pressure system (LPA) and high-pressure system (HPA). In a low-pressure system, the roots of plants are constantly misted, while in a high-pressure system, the irrigation cycles are very short, usually for 5 seconds every 5 minutes. When you are looking to purchase a pump for aeroponics, you’ll need to consider not just the pump’s capacity (how many gallons of water it can move per hour) but its pressure power too—this is measured in pounds per square inch (PSI).
If you’re interested in an aeroponic system and it’s your first time doing this, you could buy a kit to get things set up easily. If you want to build an aeroponic system yourself, look no further!

Building an Aeroponic System
It is possible to build a basic aeroponic system at home using a bucket, a sprinkler head, a pump, a timer, and pots to hold the plants in the air. You can do this with a single-bucket system or a multi-bucket system. If you are new to hydroponics and this is initially more of a hobby, then a single-bucket system should be sufficient. If your focus is more small-scale farming, then you may need to set up a multi-bucket system.
To build a single-bucket aeroponic system, you will need:
-
Big plastic planter or pot without holes
-
Small round flowerpot
-
3–7 feet (0.9–2.1 m) of garden hose
- T-hose
- Aquarium water pump
- Timer for the pump
- Hydroton
- Nutrient solution
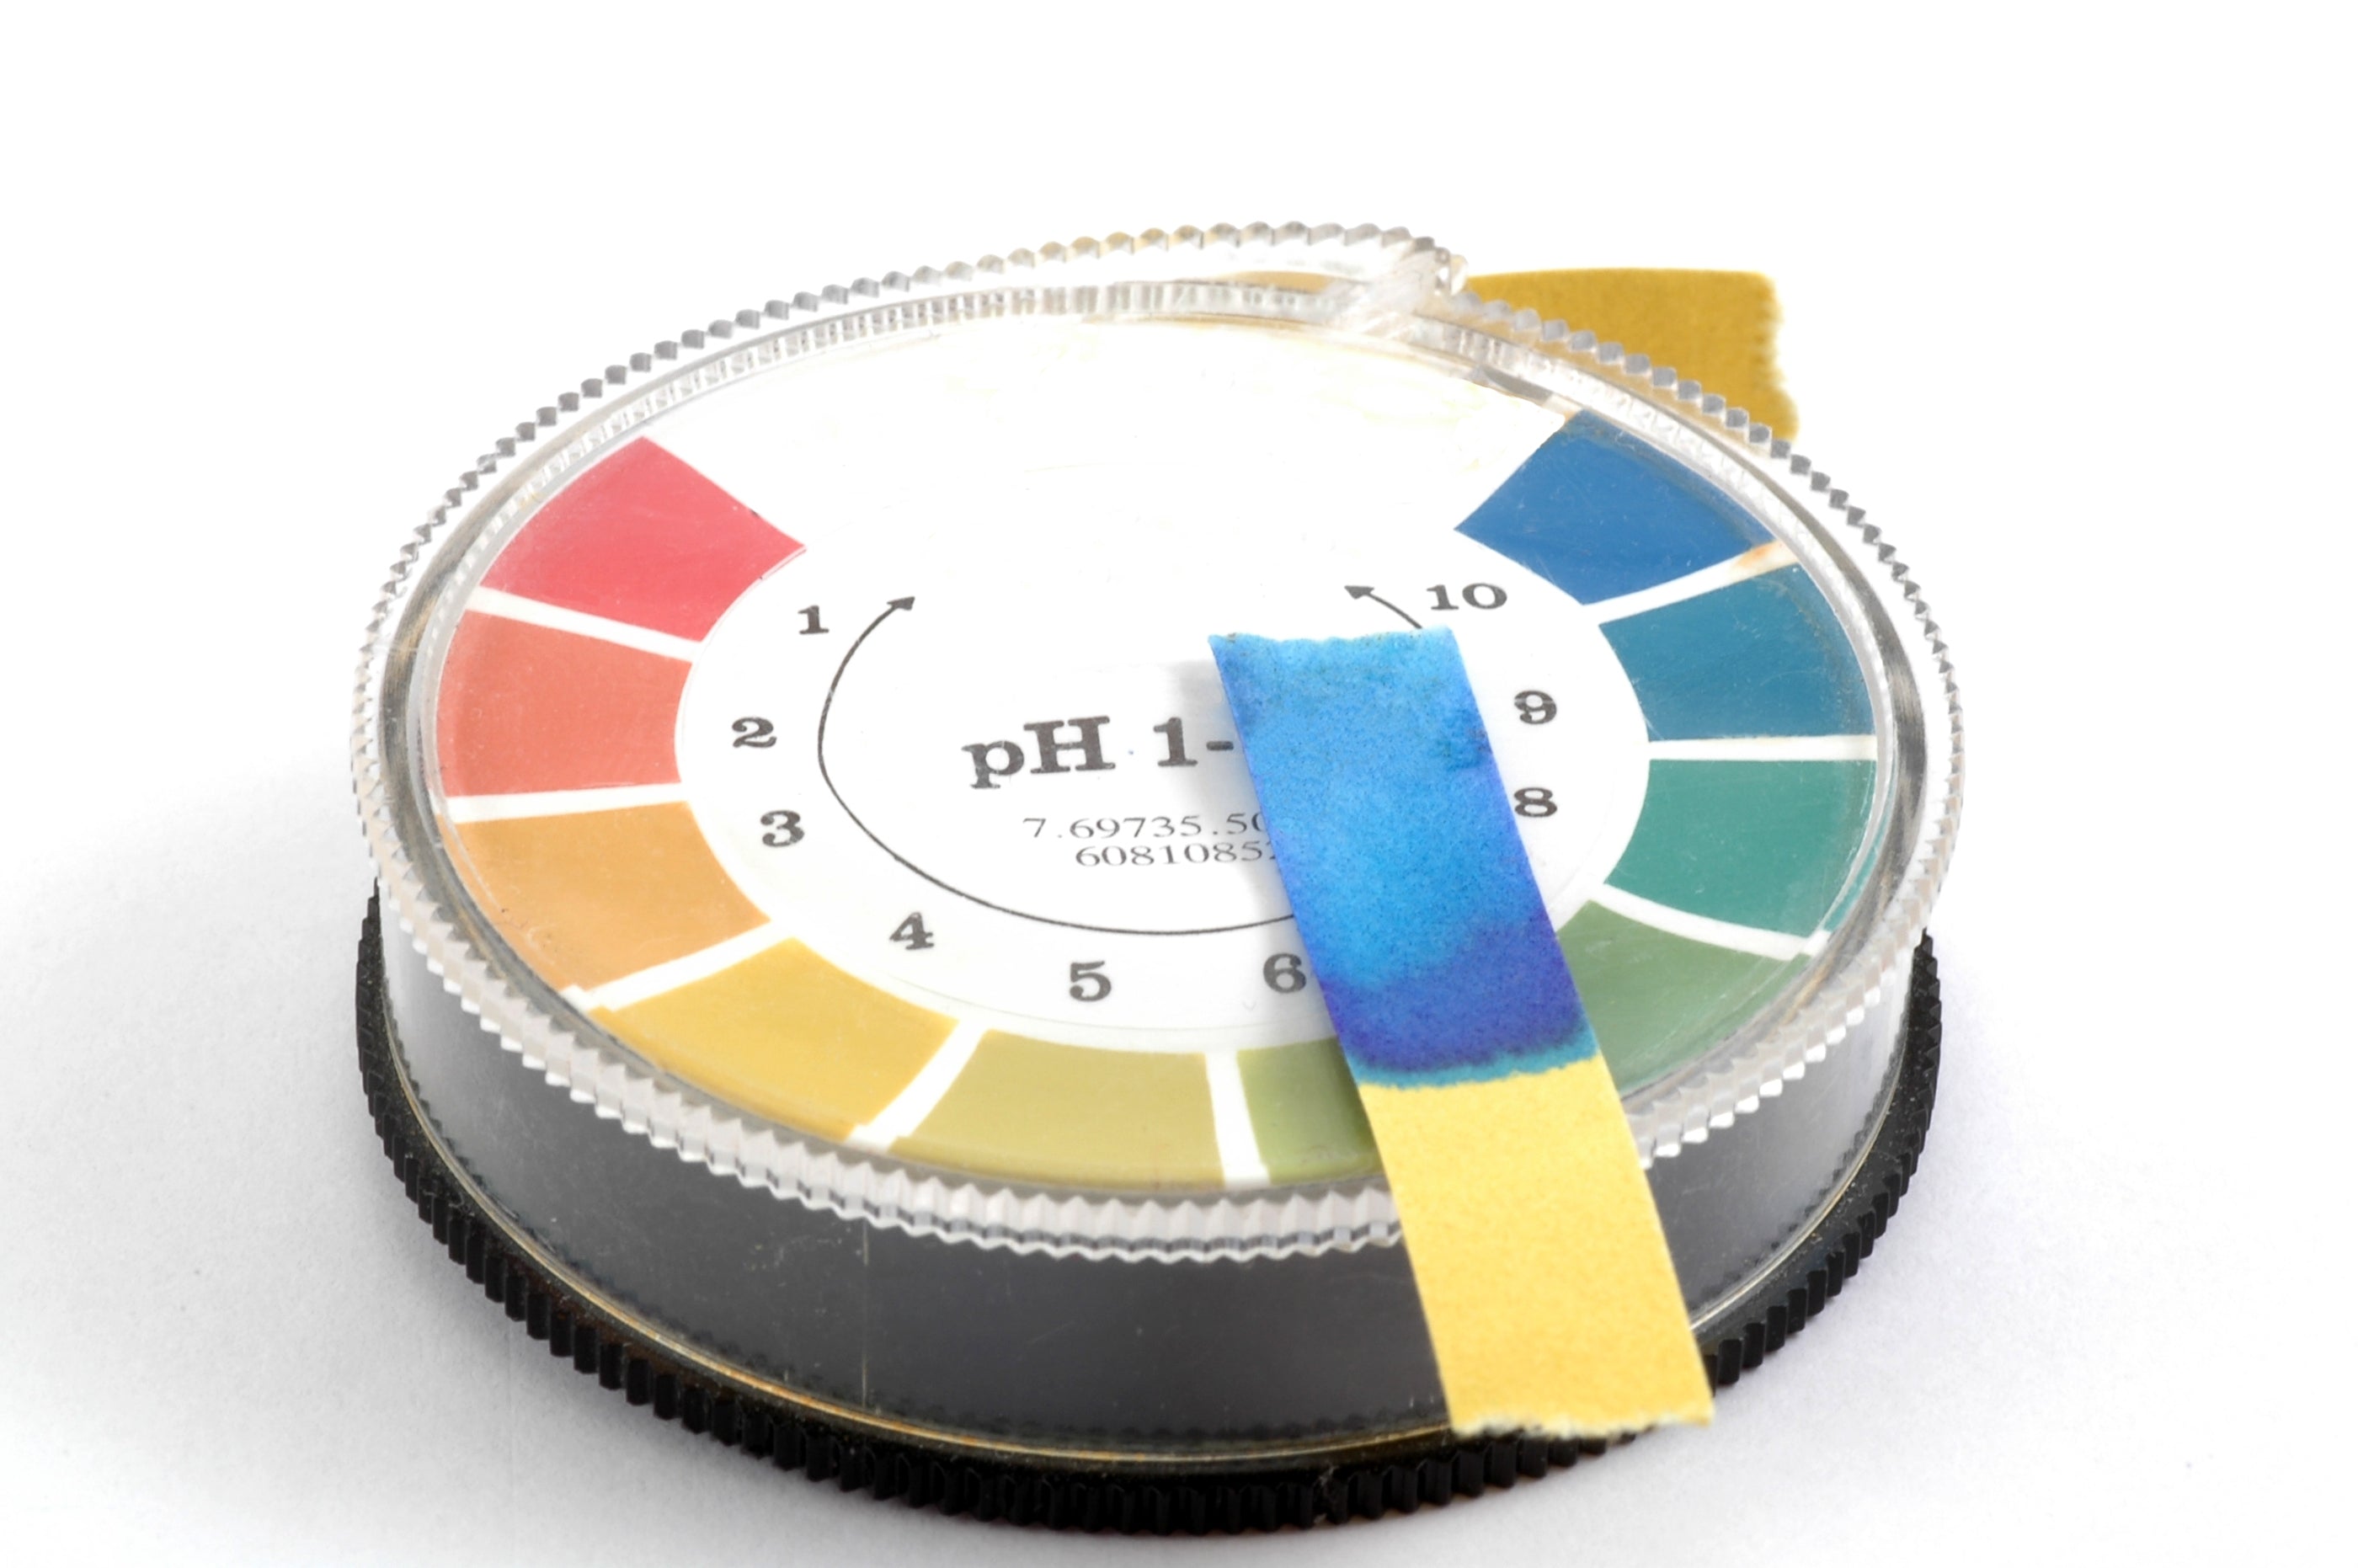
- pH meter
- pH control kit to adjust the pH level of your nutrient solution
Instructions
-
Cut the garden hose into two pieces—one for the filter and another one for the “circle dripper”.
-
Put the garden hose for the pump into the large hole. The second piece of the garden hose will be used to connect both ends to the T-fitting. You can use any rubber tubing in place of the hose.
-
Drill 30 small holes into the “circle hose”—this will let water drip down, so you don’t want the holes to be too big.
-
If you wish to drill a hole in the bottom planter—you can, and this will allow the pump cord to come out.
-
Now you need to connect one end of the hose to the pump. Fill the bottom planter with the nutrient solution, and place the pump inside. Feed the hose up and through, and connect it to the “circle dripper”. The pump should be at the bottom of the large planter, and it needs to have nutrient solution in it.
-
Check the pH level of your solution. It should be between 5.5 and 6.5. If it’s outside the recommended range, you can adjust it with the pH control kit.
-
Fill the pot with hydroton, and then place your plants in it.
- When you turn the pump on, you should see water dripping from the hose.
- You will need to make a habit of checking how much water is in the bottom planter on a daily basis.
If you want to build a multi-bucket system, you will need:
-
Three 5-gallon (19L) buckets
-
Three ¾-inch (1.9 cm) grommets
-
5 feet (1.5 m) of ¾-inch (1.9 cm) plastic hose
-
One ¾-inch (1.9 cm) T-connector
-
Two ¾-inch (1.9 cm) connectors for tubing
- Net pots
-
A water pump, ideally 264 gallons per hour (1000 litres per hour)
-
5 feet (1.5 m) of ¾-inch (1.9 cm) plastic tubing
-
¾-inch (1.9 cm) end cap for tube
-
¼-inch (6 mm) connectors
-
4 feet (1.2 m) of ¼-inch (6 mm) spaghetti tubing
-
1 gallon per hour (3.8 litres per hour) pressure compensating dripper
- Air pump
-
12 feet (3.6 m) of air tubing
- Air stone
- Hydroton
-
Rockwool cubes that are 6 by 6 inches (15x15 cm)
- Nutrient solution
- pH meter
- pH control kit to adjust the pH level of your nutrient solution
Instructions
-
In two buckets, drill a ¾-inch (1.9 cm) hole 2 inches (5 cm)from the base. In the third bucket, drill a ¾-inch (1.9 cm)hole 1 inch (2.5 cm) from the base (this one should be your reservoir bucket). Put the rubber grommets in the bucket holes.
-
Cut the 5-foot (1.5 m) ¾-inch (1.9 cm) plastic hose in half. Put a ¾-inch (1.9 cm) connector on one end of each hose bit. Connect the pieces of the hose with the T-connector. Place the T-connector into the grommet of the reservoir bucket. Connect the other two buckets to the main reservoir.
-
Fill a 5-gallon (19L) bucket with the nutrient solution, test the pH level, and alter it accordingly with the pH control kit. It should be between 5.5 and 6.5. Using the 5 feet (1.5 m) of plastic tubing, put one end on the water pump, and put the end cap on the other end. Using a ¼-inch (6 mm)hole puncher, make a hole on each side of the tubing halfway down, and put in the ¼-inch (6 mm) connectors. Cut the 4-foot (1.2 m) spaghetti tubing in half, and fit each half to one of the ¼-inch (6 mm) connectors. Put a pressure compensating dripper on the open end of the spaghetti tubing.
-
Put your plant baskets into the two outer buckets, and fill them up halfway with hydroton. Put a rockwool cube into the centre of the basket, and then fill up the remaining space with more pellets.
-
Cut the 12 feet (3.6 m) of air tubing into equal pieces depending on how many air outlets your pump has. Connect the air stone to the air pump using the air tubing.Put the air stone into your reservoir bucket, turn on the air pump, and make sure it’s working correctly and oxygenating your nutrient solution.
- Put the submersible pump (NOT the one for your air stones) into the reservoir bucket. Put the tubing between the planter buckets, then stake the spaghetti hoses and drippers into the rockwool. Once the pump is fully submerged in water, turn it on. If you add more water to the reservoir, make sure to adjust the pH level of your nutrient solution.
For more great content check out the Proponics YouTube channel below!

By Max Barnes
Max Barnes is a long-time homesteader and author. Max grows the majority of his own food year-round using a variety of different methods, including hydroponics. Hydroponic gardening plays a huge part in his homestead and self-sufficiency goals.
Hydroponic Growing Medium Explained
Hydroponic Nutrient Monitoring